Spooky Letters Halloween Craft Tutorial + Joann Fabrics 50% OFF COUPON #spookyspaces
This post may contain affiliate links. Please read my Disclosure and Privacy Policy.
The seasons have definitely changed and there’s no denying fall is here. It’s by far my favorite time of year. With it comes beautifully colored leaves, that crisp smell in the air and autumn decorations. Joann Fabric and Craft Stores® recently asked me to come up with a spooky space as part of their Celebrate the Seasons campaign (#spookyspaces). I hope you enjoy creating this for your own spooky space. I’d love to see what you come up with!

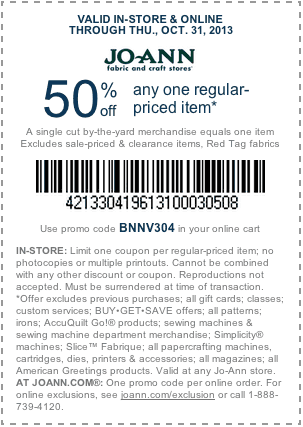
I decided to show you three variations on covering a simple letter form. I chose the word “BOO” but you could do this for any letters (initials, name, or any word). Although I don’t have a Joann Fabric and Craft Store® in my neighborhood, I was able to order directly from Joann.com. I was really impressed with their selection and the ease of ordering online. They also offer awesome coupons (hint: take a peak below!)
MATERIALS:
- Wooden letters (I suggest these 6 inch white wooden letters as they have a flat bottom and sit on a ledge easily)
- Decorative papers (scrapbook papers, tissue paper, old sewing patterns, newspaper, wrapping paper, brown craft paper, etc.)
- Mod Podge
- Foam brushes
- Hot glue gun
- Embellishments such as stickers, papers, buttons, googly eyes, sequins, yarn, etc.
- Optional: I used Beads in a Bottle to add dimension and interest to my letters and just LOVE this product!

Tear brown craft paper into small pieces and cover your letter using Mod Podge. I suggest gluing the entire surface of the letter first, then applying the paper and using the foam brush to cover the paper with more Mod Podge. Keep applying pieces overlapping each other and going around the corners. Don’t worry about it looking messy. The glue will dry clear and you’ll have a beautifully textured piece the more you overlap. My 4-year old daughter loved helping with this. There’s nothing precise or perfect about this technique so it’s a great one for kids to help with. Set this aside to dry and then apply an embellishment if you’d like.
I chose beautiful, brown buttons from Joann.com and let my daughter lay them out onto the letter. I used a hot glue gun (keep the kids far from this one!) to adhere each button to the letter and set it aside to cool/dry.

Next I did the most common Mod Podge technique. Simply cut or tear pieces of paper and glue them to the letter. Be sure to overlap to create interest and texture. I left some white spaces showing through. I mixed papers from the first and last letters to help tie them all together. I used Halloween embellishment papers to find some inspirational words that fit our theme. Next I added some spooky Halloween stickers. Apply another coat of Mod Podge over the entire surface and set aside to dry.

For the last letter I chose a more complicated technique. You’ll need to do some detailed cutting (especially if you’re using a letter with an enclosed shape as you’ll need a blade). I chose a scrapbook paper and traced my letter on the reverse side of the page. Then I traced around it again leaving room to fold and cover the edge of the letter (measure the edge of your letter to get this space). Cut on this outer line and then cut slits about every half inch from the edge up to (not past) the outline of your actual letter. (Pictured above) Next cut out any enclosed shapes with a blade. Glue the surface of your letter with Mod Podge or your adhesive of choice and carefully bend your sliced tabs of paper around the shape of the letter. Apply a layer of Mod Podge over these tabs to ensure they stay glued down.
Next apply an embellishment over the paper if you’d like. I used googly eyes and LOVE how it turned out. My daughter helped pick out and place the eyes on the letter. We used Tacky Glue to adhere them.
Optional: I added one last bit of interest with Beads in a Bottle in a gorgeous copper color. Simply place a dot of this onto the paper and pull straight up. As it dries it self levels and looks just like a little bead on your project. You can make “beads” of varying sizes depending on how much of the product you apply.

Set your letters aside to fully dry which should only take an hour or two at most depending on how many layers of glue you applied.

Finally, find a spooky space to decorate! I added a black lace spider placemat and a flameless wax candle (child safe) from Joann.com to finish the look my spooky space.
I put my spooky letters in a windowsill in our home but they’d look just as nice on a shelf, on a table or even hanging on the wall! Don’t be afraid to get creative and remember you can apply these techniques to any holiday or decorative theme.
For more great spooooky ideas be sure to visit .
Disclosure: This post is part of the JoAnn Fabric and Craft Stores® Celebrate the Seasons campaign. I received compensation for this review; however, this is my personal, honest opinion based on my experience.
What a cute craft! I think I would make all the letters with the eyeballs on them to make it more spooky for Halloween!
love that,its so cute an not expensive to make either,,lots of stuff you could get a the dollar tree too.I love going to JoAnns Fabric,,an espically after the holiday is over they mark down really well
Fun and we are going to JoAnns today.
ohhh I can only imagine your house on Halloween!
Very nice craft and thanks for reminding me about the coupon. I am a fabricaholic (a quilter and have been wanting to go to JoAnns!)
Thank you for the coupon!! We love Joanns!! And your craft turned out so cute!!
I love the 50 percent off coupons from JoAnns, and we sure spend a bunch of money there every year.
i love the eyeball O, thanks for the coupon notice too, great for craft time like halloween
Looks like a fun project.
looks like fun to make!
I love the googly-eye letter the most! This is a really cute craft and I love that it’s easy enough for kids, too. My girls definitely want to be hands-on when we do projects.
It will be lots of fun to do the spooky letters with my granddaughter this afternoon. She is so excited about decorating for Halloween…
Those are really cute and creative — easy enough for even me to do.
Whats so cute about this, is you could do it for every holiday!
i like this project – its fun without being too cutesy! i also love Joanne’s. i shop there often for craft supplies
So cute! We did this with burlap and then decorated with fall colored items and added the googly eyes. Turned out great!