Faux Pewter Wall Art Tutorial
This post may contain affiliate links. Please read my Disclosure and Privacy Policy.
Whether you are struggling to find the perfect piece to fit your decor, or you simply would love a fun art project to complete in your spare time, this wall art tutorial is a great option! Created by Jamie Satterwaite, this art can be created and ready to be hung in just a few hours. And lucky for me, I don’t have to be a great artist in order to create my own beautiful faux pewter art.

The step by step instructions show just how simple it is create something beautiful for your home using wall decals.

Supplies Needed:
- Glass picture frame
- Silver Leaf
- Soft paint brush
- Metallic black acrylic paint
- Metallic gray acrylic paint
- Metallic white acrylic paint
- Spray adhesive
- Old toothbrush
- Gloves
- Vinyl decal or quote
Directions:
Remove glass from frame and clean well.
 If adding a vinyl quote or decal, apply to glass.
 Using a toothbrush, dip into white metallic paint a splatter the paint onto the glass. The best way to accomplish this is the dip toothbrush into paint, wipe excess off and slowly drag your thumb across the top.
 Repeat this step with the other colors. Continue to splatter until you are happy with the final results. Just remember, a little goes a long way.
Allow paint to dry completely.
Working in small sections, spray an area with adhesive and apply silver leafing. Using the paintbrush, smooth out any air bubbles as you go.
 Repeat this process until completely covered.
Allow to dry for 4 hours before placing it back into the frame.
 I love this look! With such a wide variety of wall decals on the market, including quotes, you can really let your imagination run wild with this project.
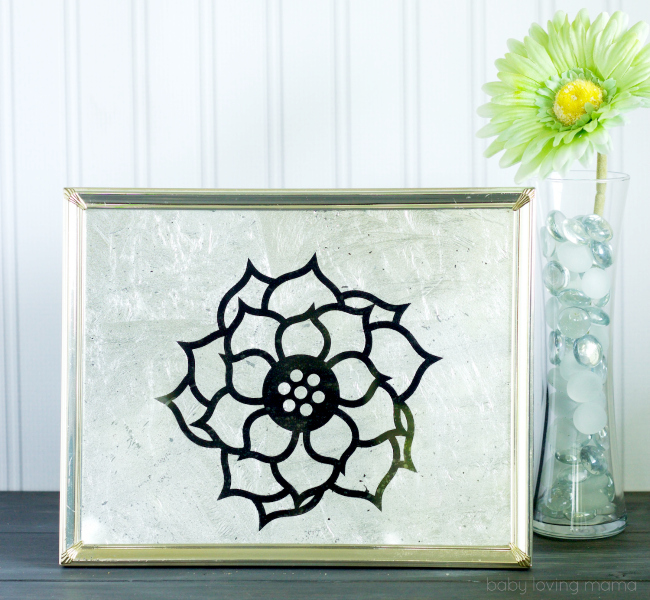
That turned out really well! I love the way it looks and it makes such a nice addition to any home!
that is so cool,and stylish looks really easy to make too
This looks like you bought it at the store. Great step by step insturctions, and pictures help. Very pretty, would make a great gift too.