3 Ingredient Ghost Pudding Cups (Easy Halloween Dessert)
This post may contain affiliate links. Please read my Disclosure and Privacy Policy.
These white chocolate Halloween pudding cups are spooky, sweet, and ridiculously easy to make! With just 3 ingredients and no baking required, they’re the perfect last-minute Halloween dessert for parties or family nights. By using snack cups with lids, they can be stacked and are very portable. Cute, and fun, these ghost cups are an easy Halloween treat for all ages!

Have you ever made a 3 ingredient pudding mousse yet? If not, you are in for a treat! Not only is it ridiculously easy to make, it really elevates instant pudding mix and can be customized with any flavor. A couple of years ago I made a similar mousse recipe using chocolate pudding to create a graveyard treat for Halloween which includes edible tombstones and crumbled brownie dirt. This one is even more simple than that.
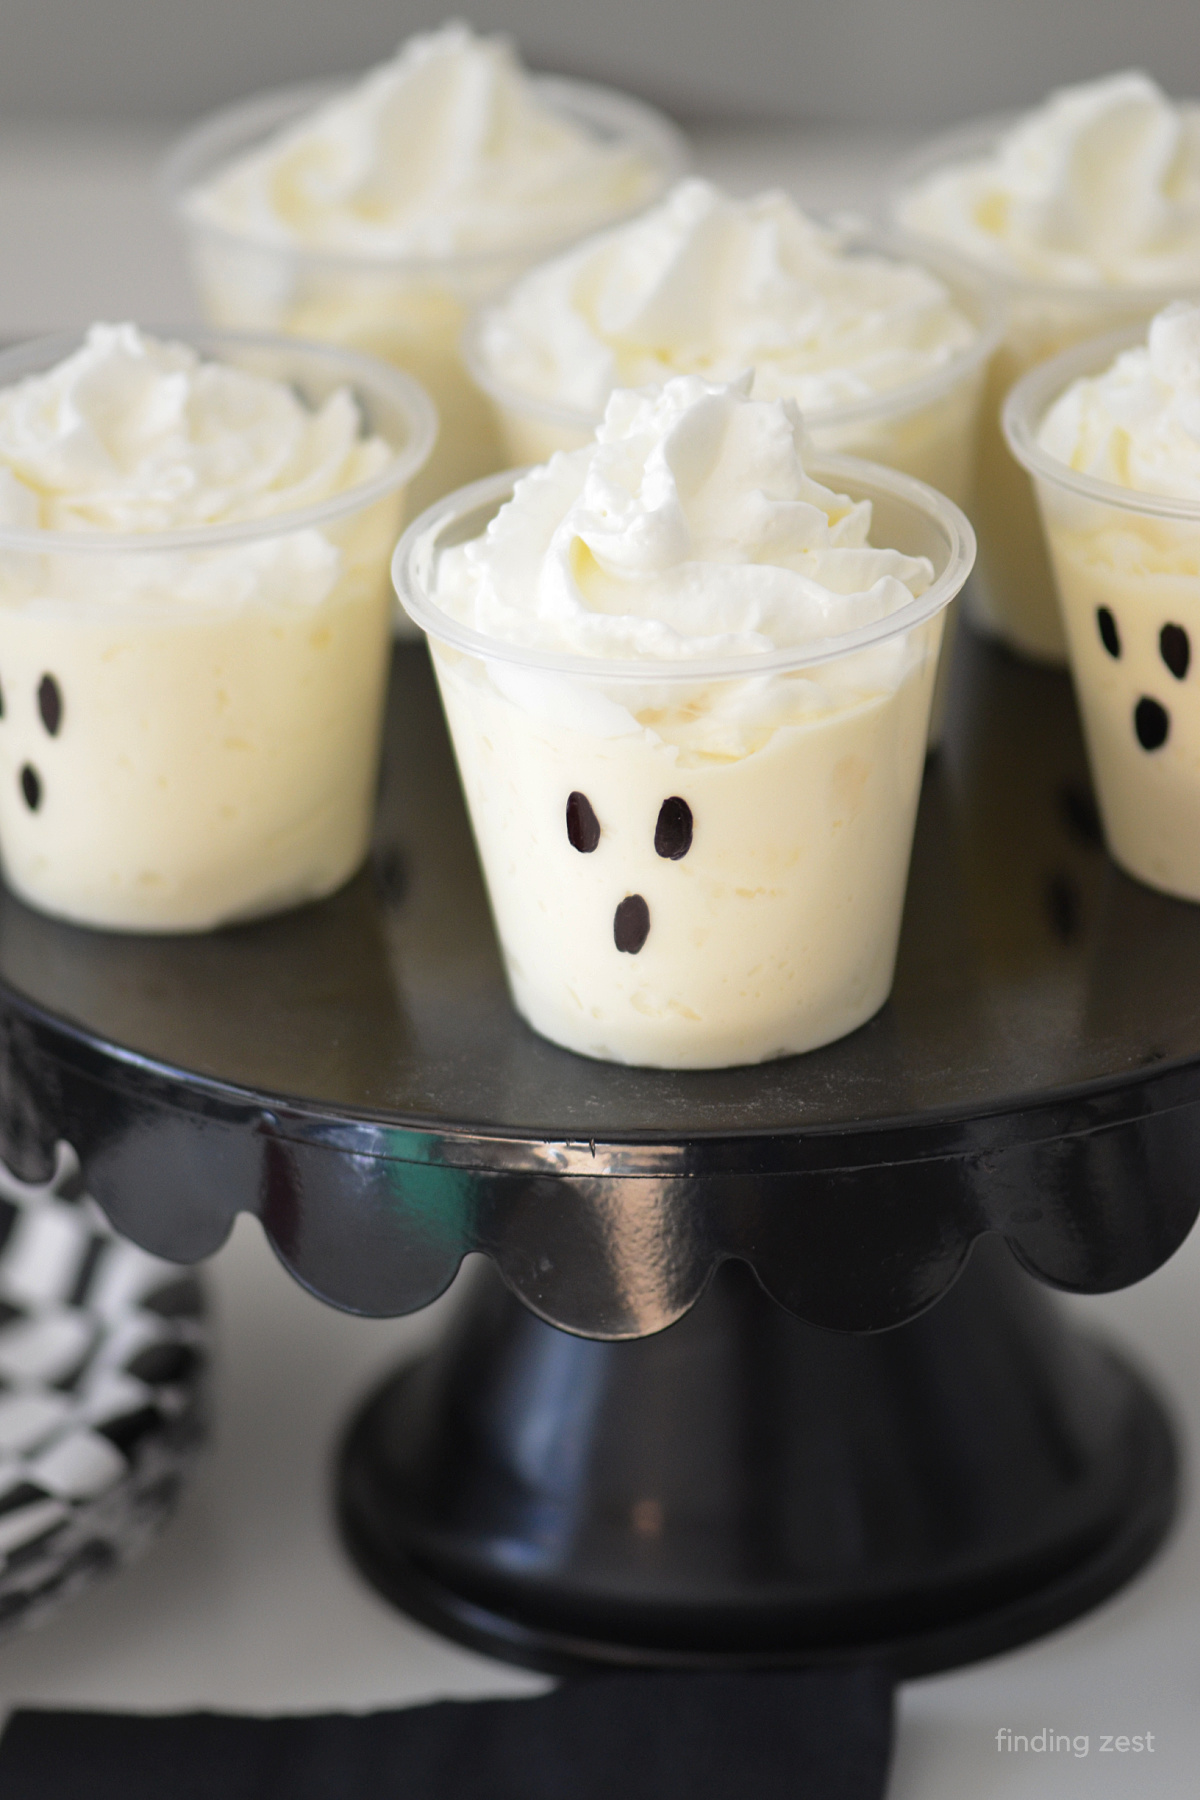
I used plastic snack cups for this Halloween pudding recipe. That makes these ghost pudding cups a very portable and stackable party snack using common supplies you can pick up from any big box store. It works great for Halloween parties, including classrooms as long as you can keep them chilled until serving.

The addition of heavy whipping cream, along with being whipped for several minutes, results in a pudding that is thick and creamy. Downright dreamy! Top off your cups with whipped cream or whipped topping for an optional finish. My family loved this recipe and they didn’t last long.

Halloween Pudding Cup Ingredients
These 3 ingredient pudding cups are so easy to make! You’ll need the following:
- instant white chocolate pudding: You can substitute cheesecake instant pudding but it won’t be quite as white. Vanilla pudding will create a cream color.
- milk (whole milk preferred but can use 2% or 1% if needed)
- heavy whipping cream
- whipped cream or whipped topping (optional)
- snack cups: I used 5.5 oz clear plastic snack cups with lids. I got mine from Walmart but Amazon also sells them for a good price.
- sharpie permanent marker (or ghost stickers)
You can make 6 snack cups with this recipe and a 5 to 6 ounce cup. Stretch it by using smaller cups or double or triple the recipe for larger groups.
Sugar Free Pudding: You can substitute sugar free pudding but the flavor won’t be quite as rich and you may notice an aftertaste.

How to Make Ghost Pudding Cups
Add a ghost face to the side of the snack cups using a sharpie. You can make them all the same or have fun with different variations. You could also make Jack Skellington faces with these same supplies!

Chill your metal mixing bowl and beaters in the fridge like you do for homemade whipped cream. This doesn’t take long and is worth it! Add the white chocolate pudding, milk and heavy whipped cream.
Beat until it thickens and peaks form. You will need several minutes of beating with an electric mixer.

Fill your snack cups evenly with the chocolate mousse using a spoon or filled pastry bag. Spread out out the top using the back of the spoon. This thicker than traditional pudding so it won’t be as smooth along the sides and you may have gaps. Gently tap your ghost cups against the table with the up down motion to help with this.

Refrigerate for at least 30 minutes to one hour before serving. These taste great the next day so make them in advance to save yourself time!

You can add whipped topping or whipped cream to the tops before serving, if desired.

How long does pudding mousse last in the fridge?
You can keep the pudding cups in the fridge for up to four days so feel free to prep them a day or two in advance. The lids make it very easy to stack and store. In fact, I think they taste best the next day. If you want to add any whipped topping or whipped cream, allow your pudding mousse to chill for at least 30 minutes first or wait until serving time.
- If you use COOL WHIP whipped topping or stabilized whipped cream, they’ll stay picture-perfect for up to four days.
- If it’s regular homemade whipped cream, best to serve within 24–36 hours, since it can start to deflate slightly.
- Canned whipped cream deflates the fastest and generally within 15 minutes.

Kitchen Tip: Stabilized Whipped Cream
If you are planning to serve these Halloween pudding cups at a later time, I recommend whipped topping like Cool Whip which is more stable. If you would like to use real whipped cream, stabilize it for best results. There are several options with various ingredients including powdered sugar, instant pudding, gelatin, cream of tartar or corn starch. You can get full instructions for stabilized whipped cream from Sugar Geek Recipes.
If using whipped cream from a can like I did, offer it for guests to add themselves or do it immediately before serving. While it is the easiest method, it melts quickly.

If you are throwing a Halloween party and need some more recipe ideas, check out my spooky charcuterie with skull cheese ball and green non-alcoholic Halloween punch.

Halloween Pudding Cups
Love Halloween pudding cups? These 3-ingredient Ghost Pudding Cups are an easy, no-bake Halloween dessert made with creamy white chocolate mousse and topped with whipped cream. Cute, spooky, and perfect for parties or classroom treats!
Ingredients
- 1 box (3.4 oz) instant white chocolate pudding
- 1 cup whole milk
- 1 cup heavy whipping cream
- whipped cream or whipped topping optional
Instructions
-
Using a black permanent marker, draw on ghost faces on the side of the snack cups. Set aside.
-
Chill bowl and beater(s) for mixer.
-
Beat white chocolate pudding, milk and heavy whipping cream until peaks form. (This will take several minutes) .
-
Spoon mixture into six 5.5 oz cups, filling evenly, approximately 2/3 of the way to the top. Tap bottoms with up and down motion on a hard surface to remove bubbles.
-
Transfer cups to the refrigerator for at least 30 minutes.
-
Top chilled cups with whipped cream or whipped topping, if desired.*
-
Serve immediately or cover with lids and refrigerate until ready to serve.
Recipe Notes
*If adding whipped cream ahead of time, it is best to use a whipped topping like Cool Whip or stabilize your homemade whipped cream so it doesn’t deflate. If using whipped cream from a can, add right before serving or allow guests to add it themselves for best results. See post for more info.
These mousse cups can be prepared a day in advance and stored covered in the refrigerator until ready to serve.
Can substitute sugar free pudding mix or 2% or 1% milk, although the pudding mousse won’t be quite as rich and creamy.
Nutritional information is based on third-party calculations and should be considered estimates. Actual nutritional content will vary with brands used, measuring methods, portion sizes and more. These totals do not include any whipped topping or whipped cream.