Dinosaur Cupcakes (Easy Dirt Cupcake with Chocolate Topper)
This post may contain affiliate links. Please read my Disclosure and Privacy Policy.
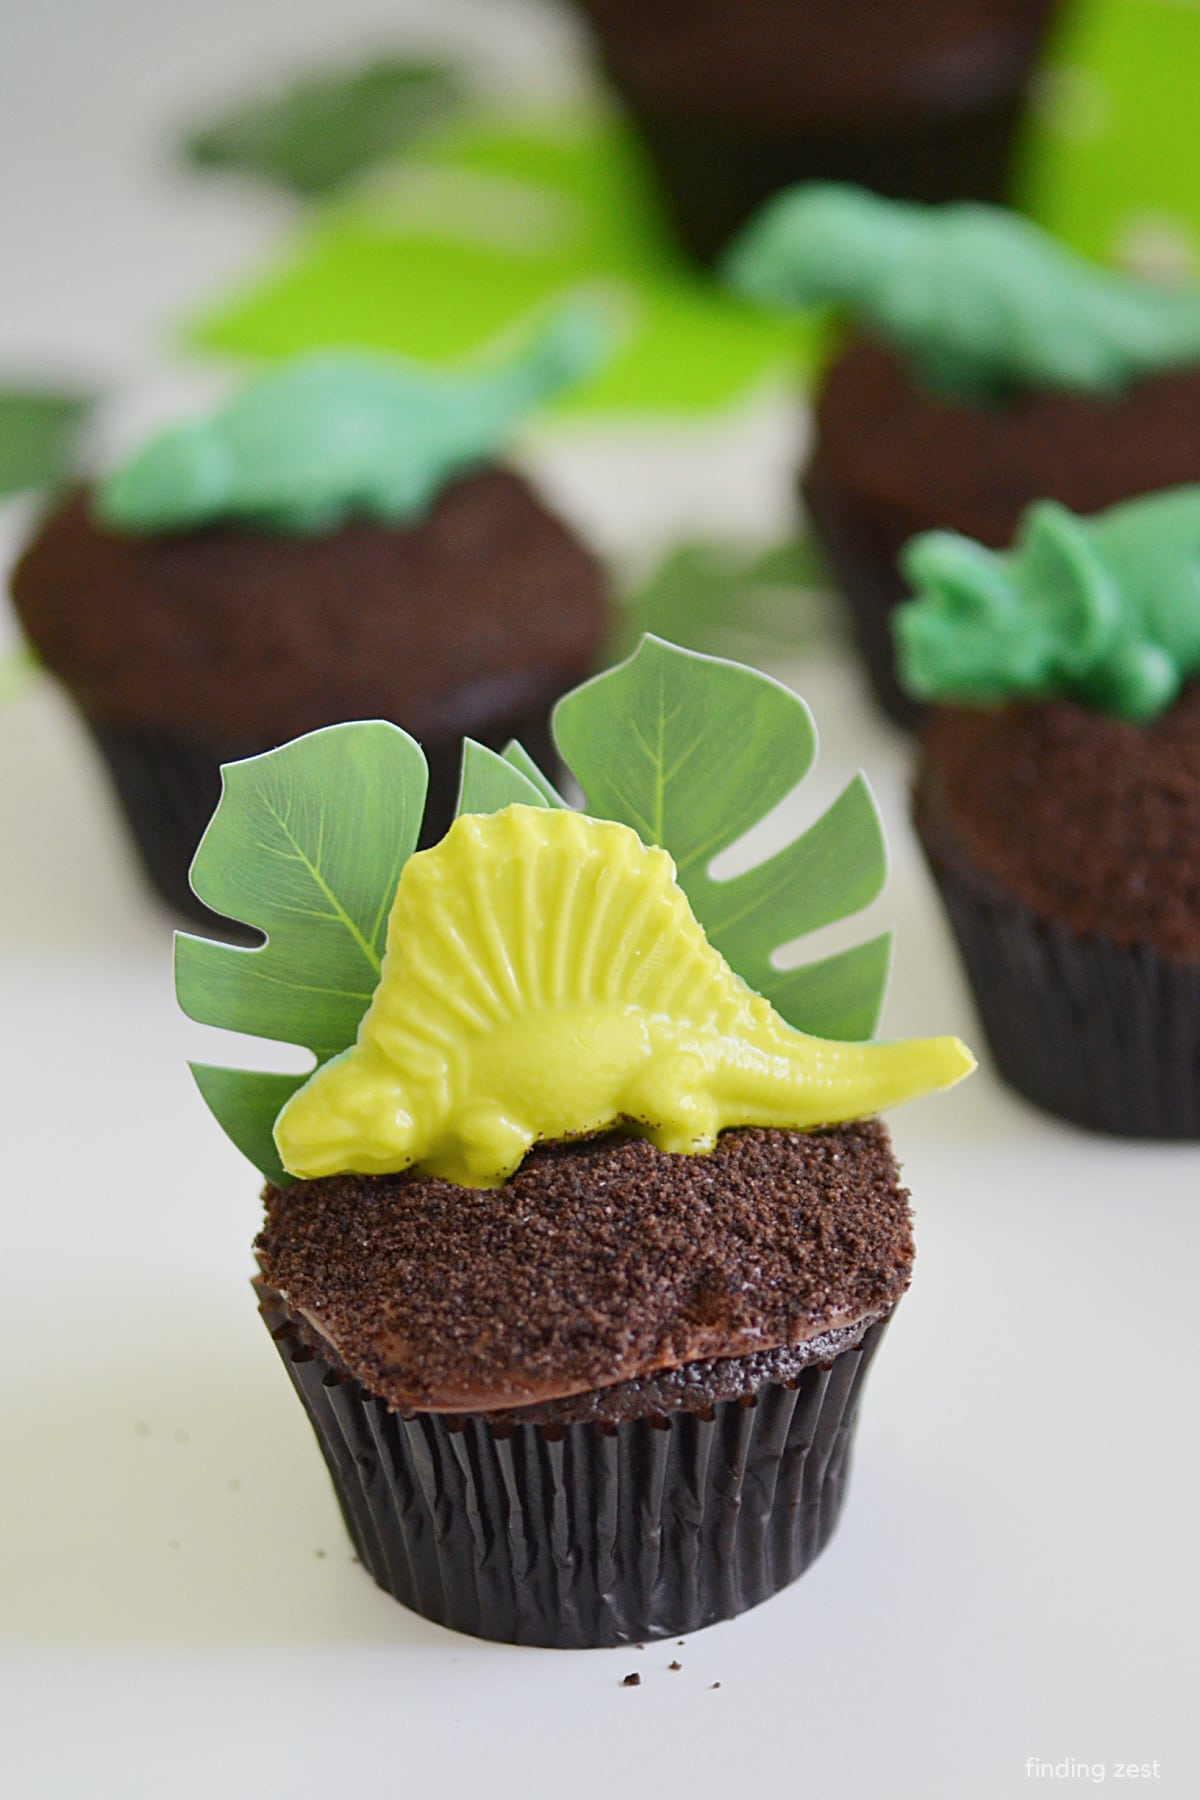
These dinosaur cupcakes are perfect for kids of all ages and are an easy and fun birthday cupcake idea. Use your favorite cake and frosting recipe or keep it extra simple with a box cake mix and store-bought frosting. You’ll be shocked they are so easy to put together. Plus, the chocolate dinosaurs on top make them really stand out. Everyone will love these fun cupcakes!
The dinosaur birthday party theme has never gone out of style and is always a hit. This dinosaur watermelon is one of my most popular birthday party posts! Dinosaur cupcakes like these are really easy to make for bakers of all levels. I used a cake mix and a tub of frosting and they still turned out amazing! But you can easily use your own favorite recipes for cupcakes from scratch and homemade frosting. The key to making these cupcakes look great is oreo dirt and chocolate dinosaur cupcake toppers.
Dinosaur Cupcake Ingredients and Supplies
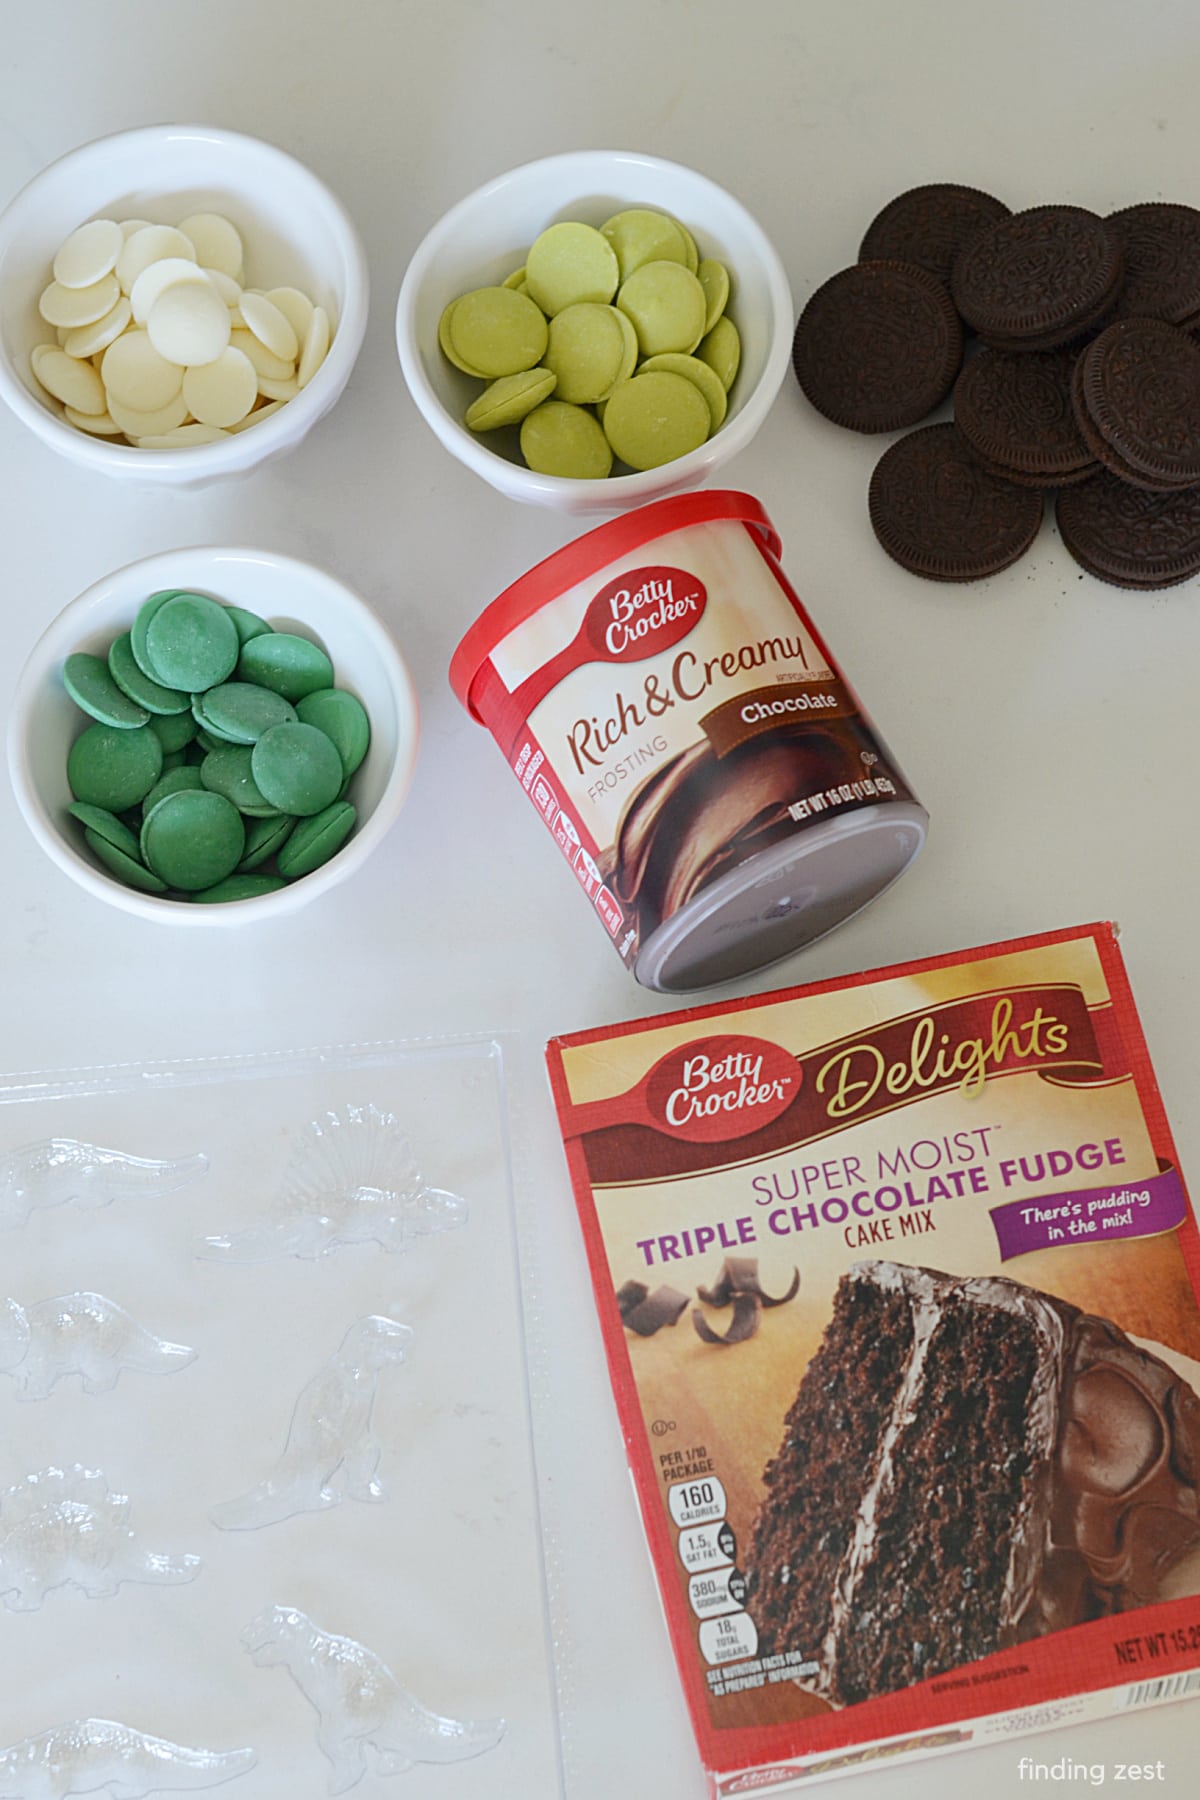
To make these dinosaur theme cupcakes you’ll need the following ingredients:
- chocolate box cake mix
- oil
- eggs
- chocolate tub frosting
- 8 oreo cookies (approximate)
- candy melts in green, vibrant green, white (or other colors)
- plastic dinosaur chocolate mold
- cupcake liner and palm tree cupcake toppers (optional)
I used a plastic chocolate mold to make a dinosaur cupcake topper, but you could also use store-bought candy like gummy dinosaurs, small toy dinosaurs or dinosaur cupcake picks in a pinch. If that dinosaur mold is out of stock, you can try this one or this one, however I have no experience with those molds.
How to Make Chocolate Dinosaur Cupcake Toppers
These chocolate cupcake toppers are super simple to make yourself! Melt 1/2 cup to 2/3 cup cup candy melts per 12 dinosaurs you’d like to make, assuming you use the same dinosaur mold I did. In a small microwave safe bowl, melt in short 15-30 second intervals, stirring often. Do not over cook chocolate. Stir to completely combine and add a bit of canola oil or shortening for a super smooth look.

I chose to create multiple shades of green so I mixed some white candy melts with green to create a third shade. But you can choose whatever colors fit your theme best!

Using a spoon, carefully drop chocolate in plastic mold, carefully filling to the top but not overflowing. It helps to add to the center and gently push out to the edges, making sure to get all crevices.

Gently tap the mold on a hard surface to even out and remove air bubbles.

If you have a lot of excess I would suggest leveling with the flat edge of metal spatula. It will create a cleaner look for your green dino.

Then place in the refrigerator for about 15 minutes to fully harden before gently removing. Smooth out edges if needed.

Tips for Using Chocolate Molds
I am using chocolate loosely here, as this project using candy melts. I work a lot with candy melts in plastic or silicone molds. And each time I run into some readers having issues with pieces breaking off, air bubbles, etc. Here are some things I do recommend:
- Do not the freezer to speed up the process of the chocolate setting. It can make the chocolate extra brittle and more likely to break.
- Scrap off excess chocolate from mold. By having a lot of excess chocolate, it can make the chocolate want to adhere to the mold. It also doesn’t create as nice of a finish.
- Add a very small amount oil or shortening to your chocolate and avoid overheating the chocolate. Both can make your chocolate more clumpy and not as smooth.
- Try gently bending the mold in various spots before turning it over. This helps create some separation, making removal a little easier.
- Place the plastic mold against a cutting board, flat side down, and turn it over. This is so that when you lift the mold, the shapes don’t have very far to fall and you don’t pop any out before you are ready.
- Gently press into the center of each shape if needed to remove if using a plastic mold. If you have a silicone mold, gently peel the mold back to remove the shape.
I live in Minnesota so I often am not in very hot or very humid conditions and that can change your experience. I find candy melts store well at room temperature and in the refrigerator in a airtight container. If it is hot, definitely store these dinosaurs in the refrigerator. I have not had a problem with the candy melts sweating.
How to Make Chocolate Dirt Cupcakes
These chocolate cupcakes with dirt are so simple to make. To start, you’ll want to make your favorite chocolate cupcakes recipe or use a box mix like I did. Let them cool completely. I used the cupcake liners from this cupcake set and I highly recommend using a dark brown or black liner so it appears as though the “dirt” just continues down the cupcake. I used the liners in this dinosaur cupcake set. As you can see, the brown liners are much darker than they are shown in the pictures. They are very thin, much like the lining of a Reese’s peanut butter cup. I was afraid the oils from the cupcake would cause issues but they surprisingly worked great! I topped each cupcake with some chocolate tub frosting to keep it simple. You don’t want to overload your cupcake with frosting. The amount shown below works well. If you put too much frosting on, your cupcake tops will have a harder time holding their shape after topping with dirt and it can spread out over the sides. 
You’ll need some Oreo cookie crumbs for the “dirt”. You can crush Oreo cookies in a ziploc bag and a rolling pin, but I find a food processor really does produce the the best results in a fraction of the time.

You’ll be surprised how few Oreo cookies are needed to make a lot of crumbs. I used 10 Oreo cookies and still had plenty left over.

Place your chocolate cookie crumb “dirt” in a small bowl. Tip frosted cupcake upside and gently press into the cookie crumbs, carefully rotating slightly to cover entire cupcake.

Don’t press too hard, however or you may push your frosting off the edges of your dirt cupcake.

How to Make Dinosaur Cupcakes
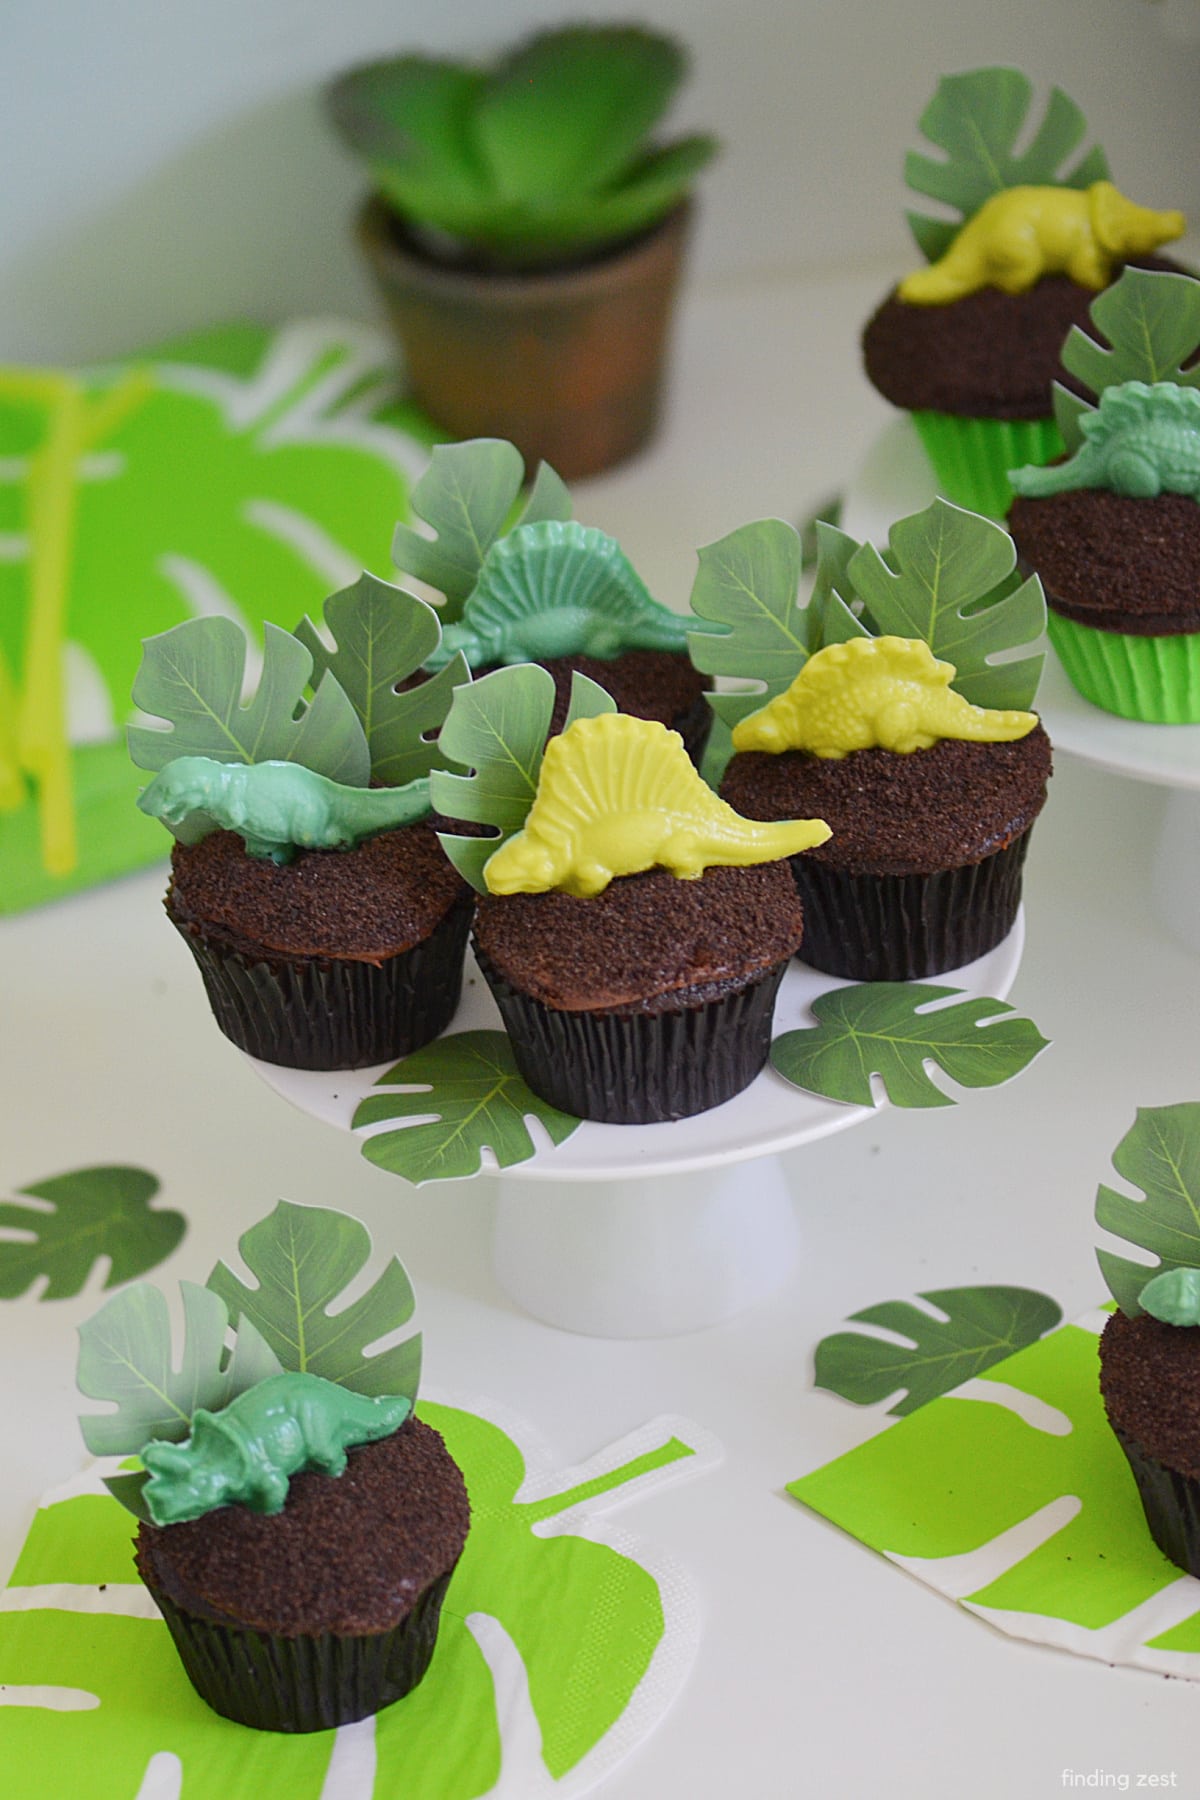
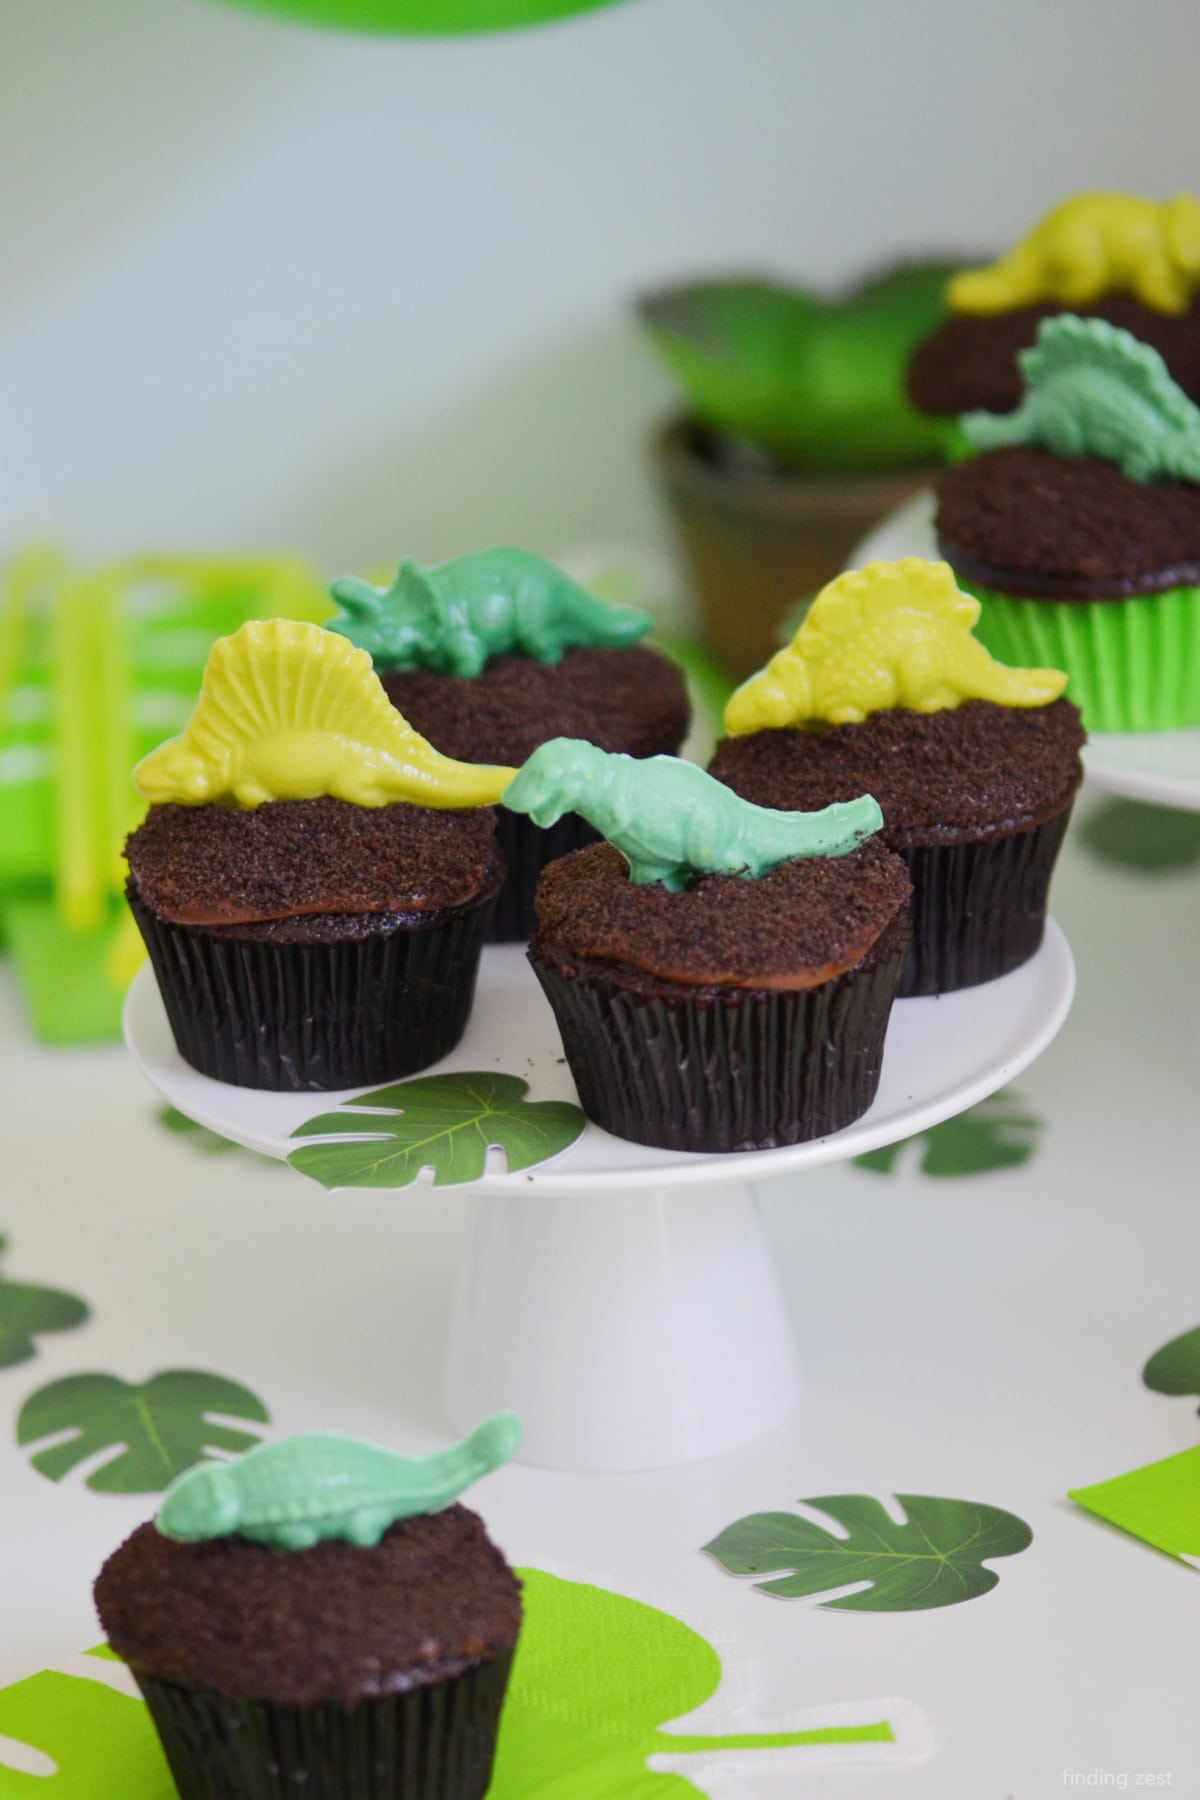
Now it is time to assemble your cupcakes! I recommend doing this shortly before serving or your before your celebration begins since the height of the dinosaur and cupcake topper makes them harder to store once assembled. Top with a chocolate dinosaur and one or two foliage cupcake toppers, if desired.

These easy dinosaur cupcakes don’t need anything additional added. The dinosaur cupcake toppers really are the star of the show. If you prefer vanilla cupcakes, you can adapt this recipe using a vanilla cake mix and keep the chocolate frosting or switch to white frosting. You could also use food coloring in the vanilla cupcake batter to create any color combination that fits your dinosaur party supplies. Either way, fun dinosaur cupcakes are sure to be a hit with all ages!
And while the palm leaf cupcake toppers are not required for these dinosaur birthday cupcakes, I think it adds a nice touch. They also work for inserting into other food items at your party or decoration as table scatter. Since this set comes with 100 of them, there are plenty of leaves to find other uses for them. These leaf cupcake toppers can also be saved for other themes such as a flamingo, jungle or tropical luau party.


Dinosaur Cupcakes
Ingredients
- 1 box Betty Crocker™ Super Moist™ Delights Triple Chocolate Fudge Cake Mix or your favorite box mix or homemade recipe
- 1 1/4 cup water*
- 1/2 cup vegetable oil*
- 3 eggs*
- 1 tub 16 oz chocolate frosting or two cups chocolate buttercream frosting
- 8 Oreo cookies
- 1 to 1 1/2 cups candy melts in various shades of green
- small dinosaur chocolate mold
- 1 teaspoon oil or shortening optional
- palm leaf cupcake toppers optional
Instructions
-
Heat oven to 350°F for shiny metal or glass pan or 325°F for nonstick pan. Line two muffin tins with liners.
-
Mix cake mix, water, oil and eggs in a large bowl at low speed for 30 seconds. Increase speed to medium and beat an additional 2 minutes.
-
Divide batter evenly to make 24 cupcakes, filling approximately 2/3 of the way full.
-
Bake for 14 to 19 minutes or until a toothpick inserted in the center comes out clean. Cool 5 minutes and transfer cupcakes to wire rack to cool completely.
-
In a small microwave safe bowl, melt candy melts in short 15-30 second intervals, stirring often. Do not over cook chocolate. Stir to completely combine and add a bit of canola oil or shortening for a super smooth look.
-
Using a spoon, carefully drop chocolate in plastic mold, carefully filling to the top but not overflowing. It helps to add to the center and gently push out to the edges, making sure to get all crevices.
-
Gently tap the mold on a hard surface to even out and remove air bubbles.
-
Level by scrapping off excess with the flat edge of metal spatula for a cleaner look.
-
Place on level surface in the refrigerator for about 15 minutes to fully harden before gently removing. Smooth out edges if needed.
-
Once completely cooled, frost each cupcake with a spatula.
-
Place Oreo cookies in a food processor until crumbs have formed. (Alternatively, you can place cookies in a Ziploc bag and crush with a rolling pin)
-
Transfer crumbs to a small bowl.
-
Tip frosted cupcake upside and gently press into the cookie crumbs, carefully rotating slightly to cover entire cupcake. Set aside. Repeat with remaining cupcakes.
-
Top with a chocolate dinosaur and one or two foliage cupcake toppers, if desired, before serving.
Recipe Notes
Exact amount of candy melts will vary depending upon dinosaur mold used for cupcake toppers.

More Kid Party Ideas
If you love throwing birthday parties for kids, check out these mermaid party ideas with a wide variety of sweet treats and crafts. I also have a fun construction birthday party ideas including this super easy construction theme cake. And how could I forget these shark jello cups? So simple to make, I promise! But here are some more easy birthday cupcakes for kids:
- beach cupcakes
- bear cupcakes
- oreo cupcakes
- little fishy cupcakes
- pinata cupcakes
- watermelon cupcakes
 /div>
/div> /div>
/div>